Difference between revisions of "LaserCutter"
(→11-01-2023 - PC setup and Camera tests) |
|||
| (11 intermediate revisions by the same user not shown) | |||
| Line 4: | Line 4: | ||
|Model=HX-40A | |Model=HX-40A | ||
|Category=Mechanics | |Category=Mechanics | ||
| − | |Operational Status= | + | |Operational Status=Functional |
| − | |Super Users=Justa | + | |Super Users=Justa, beatskip |
|Acquisition Details=On permanent loan from Justa | |Acquisition Details=On permanent loan from Justa | ||
|Owner=User:Justa | |Owner=User:Justa | ||
| Line 14: | Line 14: | ||
== Change History == | == Change History == | ||
| − | + | - updated page with latest developments in Dec-2022 (Beatskip) | |
- full rewrite of info on 2021-12-23 | - full rewrite of info on 2021-12-23 | ||
| Line 35: | Line 35: | ||
** {{Cbox}} Find suitable water-basin | ** {{Cbox}} Find suitable water-basin | ||
** {{Cbox}} Purchase submersible pump and wire it so it is on when machine is turned on. | ** {{Cbox}} Purchase submersible pump and wire it so it is on when machine is turned on. | ||
| − | ** {{Ucbox}} | + | ** {{Ucbox}} Design laser safety controller to prevent abuse of the laser [[LaserCutter: Laser Cooling Monitor]] |
* Re-work the laser-delivery head into one with Air-assist. | * Re-work the laser-delivery head into one with Air-assist. | ||
| Line 41: | Line 41: | ||
** {{Ucbox}} Purchase and mount air-pump; create wiring for it . Consider 'turn on' when starting to cut, not 'always' | ** {{Ucbox}} Purchase and mount air-pump; create wiring for it . Consider 'turn on' when starting to cut, not 'always' | ||
** {{Ucbox}} Consider chain-link cable-guide for air-delivery tube | ** {{Ucbox}} Consider chain-link cable-guide for air-delivery tube | ||
| + | |||
| + | Laminar flow Air-assist nozzle prototype design V1 | ||
| + | |||
| + | [[File:Airassistv1-alt.png|300px]] | ||
| + | [[File:Airassistv1.png|300px]] | ||
| + | |||
* Align gantry after last modifications | * Align gantry after last modifications | ||
| Line 56: | Line 62: | ||
* Consider Web interface running on a Pi to simplify usage | * Consider Web interface running on a Pi to simplify usage | ||
** Laserweb seems a good candidate [https://laserweb.yurl.ch/ Website] [https://laserweb.github.io/LaserWeb4/ Live Demo] | ** Laserweb seems a good candidate [https://laserweb.yurl.ch/ Website] [https://laserweb.github.io/LaserWeb4/ Live Demo] | ||
| − | == | + | |
| + | == Usage/setup details== | ||
| + | First of all, until the laser is fully operational and tested/validated. the laser is not yet freely useable, only when properly communicated with Justa or beatskip. | ||
| + | It should be up and running relatively soon, so just hang tight a bit longer to laze your eyes out. | ||
| + | |||
| + | the lasercutter uses a MKS DLC32 controller together with a Pi2 running laserweb. | ||
| + | It is accessible over the network as: "https://laziemclazeface.local" | ||
| + | user: lazie | ||
| + | password: youllburnyoureyesout | ||
| + | |||
| + | please do not fiddle with the pi until everything is validated and safety features are added, for both the user and the machine itself. | ||
| + | |||
| + | == Tasks/ToDo == | ||
Here is a short list of the tasks that have to be performed and which have been done already: | Here is a short list of the tasks that have to be performed and which have been done already: | ||
| − | * {{Ucbox}} ( | + | * {{Ucbox}} (T.B.D) Create user manual and usage guidelines |
| − | * {{ | + | * {{Ucbox}} (15-01-2023) Add Air Assist |
| − | * {{ | + | * {{Ucbox}} (15-01-2023) Install head camera |
| − | * {{ | + | * {{Cbox}} (13-01-2023) Purchase new Camera to attach to head |
| − | * {{ | + | * {{Cbox}} (12-01-2023) Add PC to run LaserWeb |
| − | * {{ | + | * {{Cbox}} (11-01-2023) Add additional end-stops to prevent any crashes (especially with Air-Assist) |
| + | * {{Cbox}} (12-01-2023) Purchase LaseWeb License | ||
| + | * {{Cbox}} (02-01-2023) Replaced 24V supply with 12V to stop motors skipping steps | ||
| + | * {{Cbox}} (28-12-2022) Fine bed leveling | ||
| + | * {{Cbox}} (28-12-2022) test PWM laser control | ||
| + | * {{Cbox}} (21-12-2022) Collimate laser | ||
| + | * {{Cbox}} (21-12-2022) Set up design plan for cooling system protection pcb | ||
| + | * {{Cbox}} (21-12-2022) Wire up auxilary 12V supply to pump and fans | ||
| + | * {{Cbox}} (18-12-2022) Added Project page for the cooling safety board [[LaserCutter: Laser Cooling Monitor]] | ||
* {{Cbox}} (17-12-2022) Mount additional 12V PSU for the cooling system and wire it up to share the main power connector | * {{Cbox}} (17-12-2022) Mount additional 12V PSU for the cooling system and wire it up to share the main power connector | ||
* {{Cbox}} (14-12-2022) Fix Homing coordinates and general firmware config issues | * {{Cbox}} (14-12-2022) Fix Homing coordinates and general firmware config issues | ||
| Line 72: | Line 98: | ||
* {{Cbox}} (03-12-2022) Mount LCD housing | * {{Cbox}} (03-12-2022) Mount LCD housing | ||
* {{Cbox}} (01-12-2022) Design and print LCD housing | * {{Cbox}} (01-12-2022) Design and print LCD housing | ||
| + | |||
| + | |||
| + | |||
| + | == Status Log == | ||
| + | |||
| + | ==== 11-01-2023 - PC setup and Camera tests ==== | ||
| + | The laser control PC was set up with Ubuntu and Lightburn was set up to control the lasercutter. | ||
| + | Endstops were added on both sides of the X-Axis. Since the MKS DLC32 does not accept separate endstops for the minimum and maximum of the axis, both were wired in series on the NC terminals. This will result in a trigger signal in the controller if either one of the two endstops is triggered. | ||
| + | This seems to be working perfectly and will prevent the future air assist nozzle from being bumped off due to the frame edge. some additional testing was done to refine laser power settings. | ||
| + | |||
| + | [[File:engravingtests-20230111.jpg|300px]] | ||
| + | |||
| + | Lightburn has support for a head mounted camera to scan the working area and place designs on the right place. This will allow people to most effectively use the available materials with as little waste as possible. | ||
| + | Also scanning the location of objects to be engraved is possible. | ||
| + | |||
| + | [[File:camera-test-setup.jpg|250px]] | ||
| + | [[File:lightburn-test-cam-20230111.jpg|250px]] | ||
| + | [[File:lightburn-align-test-20230111.jpg|250px]] | ||
| + | |||
| + | A new camera for this purpose was purchased, as the testing camera was way insufficient. the new camera is a 5MP OV5640 module with AutoFocus and usb 2.0. The resolution is 2592x1944 pixels. | ||
| + | The result will be an approximate 0.03mm per pixel when mounted to the laser head. Tests will show if we can utilize the autofocus data to determine the bed height. If the autofocus data is not sufficient, a laser can be added in the view to triangulate the bed height. | ||
| + | |||
| + | [[File:5mp-head-camera-lightburn.jpg|350px]] | ||
| + | |||
| + | This camera will arrive the jan 14th 2023 and will be installed as soon as possible. | ||
| + | the usb cable will be replaced with a flat flex cable that rolls over the axis and the camera itself will be mounted as close to the laser as possible to minimize the loss in working area. | ||
| + | |||
| + | == Latest Results / Photo gallery == | ||
| + | |||
| + | Latest rastering tests by PIx13 and Beatskip | ||
| + | |||
| + | [[File:Spidey-by-pix13.jpg|600px]] | ||
| + | |||
| + | |||
| + | [[File:LaseyMcLazeFaceMascotTest-01-2023.jpg|600px]] | ||
Latest revision as of 19:47, 13 January 2023
| TechInc Inventory | |
|---|---|
| Description | It cuts with lasers |
| Make | Rabbit Laser |
| Model | HX-40A |
| Category | Mechanics |
| Operational Status | Functional |
| Super Users | Justa, beatskip |
| Received at | |
| Acquisition Details | On permanent loan from Justa |
| Owner | User:Justa |
NOTE: THIS IS THE "WHITE" LASERCUTTER. THE ONE THAT HAS BEEN IN PRODUCTION HAS BEEN THE "RED" LASERCUTTER
That one belongs to 'sawugo' and is documented here: https://wiki.techinc.nl/LAOSLaserCutter
Contents
Change History
- updated page with latest developments in Dec-2022 (Beatskip) - full rewrite of info on 2021-12-23
Short introduction
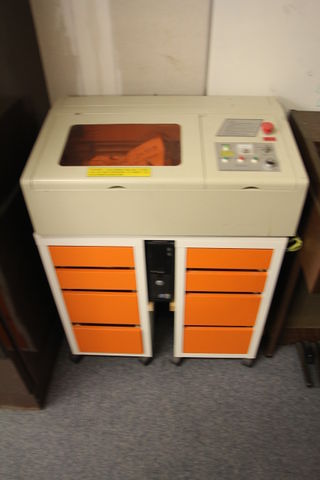
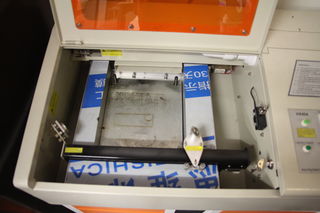
The lasercutter is a HX40A engraver/cutter, fitted with a 40Watt laser-tube, a small XY-table and originally comes with a controller-board for which only WinXP software exists that requires a PC with special USB-dongles for the license required by the software. The controller-board has all markings sanded off of all the chips and it is connected to the PC with the paralel-port like it is still 1989..
That'd not be so bad, if the software even did a good job of controlling the laser; which it doesnt. It is a nightmare.
The intention for the machine is to convert it to something modern. This work is in progress and is documented here.
Modifications
- Replace driver-board with [Makerbase MKS-DLC32 board] ESP32 based driver-board
-
 Get optical end-stops to work.
 -
 Get LCD-module mounted on front-panel (requires bezel and/or longer cables)
 -
 Test PWM-driving of laser-PSU via optocoupled 2-wire interface (see wiring-details)
-
- Set up self-contained water-cooling arrangement using PC-cooling radiators.
-
 Find suitable water-basin
 -
 Purchase submersible pump and wire it so it is on when machine is turned on.
 -
 Design laser safety controller to prevent abuse of the laser LaserCutter: Laser Cooling Monitor
-
- Re-work the laser-delivery head into one with Air-assist.
-
 Purchase air-assist laser-delivery head as a replacement OR modify current head
 -
 Purchase and mount air-pump; create wiring for it . Consider 'turn on' when starting to cut, not 'always'
 -
 Consider chain-link cable-guide for air-delivery tube
-
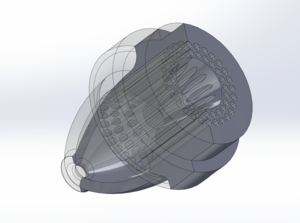
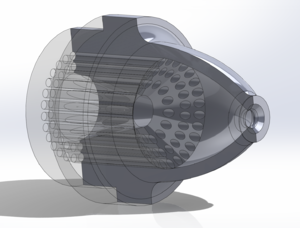
Laminar flow Air-assist nozzle prototype design V1
- Align gantry after last modifications
-
 Gantry has been removed and might need another removal
 -
 Align using the 'ABC' method, using painter-tape, or consider a 'reverse' method with laser pointing from 'head' back to tube
-
- Look at Z-bed mechanics
-
 Look at bed mechanics and fix the problematic clearings
 -
 Current bed is hard to adjust and is manual. Purchasing an extra stepper , some guide-pullies and a longer belt would allow for auto-adjust via software.
-
- Consider FluidNC firmware instead of current firmware
- This is very likely to work without problems; requires careful flashing.
- Might need patches to support LCD , if possible at all
- Consider Web interface running on a Pi to simplify usage
Usage/setup details
First of all, until the laser is fully operational and tested/validated. the laser is not yet freely useable, only when properly communicated with Justa or beatskip. It should be up and running relatively soon, so just hang tight a bit longer to laze your eyes out.
the lasercutter uses a MKS DLC32 controller together with a Pi2 running laserweb. It is accessible over the network as: "https://laziemclazeface.local" user: lazie password: youllburnyoureyesout
please do not fiddle with the pi until everything is validated and safety features are added, for both the user and the machine itself.
Tasks/ToDo
Here is a short list of the tasks that have to be performed and which have been done already:
-
 (T.B.D) Create user manual and usage guidelines
 -
 (15-01-2023) Add Air Assist
 -
 (15-01-2023) Install head camera
 -
 (13-01-2023) Purchase new Camera to attach to head
 -
 (12-01-2023) Add PC to run LaserWeb
 -
 (11-01-2023) Add additional end-stops to prevent any crashes (especially with Air-Assist)
 -
 (12-01-2023) Purchase LaseWeb License
 -
 (02-01-2023) Replaced 24V supply with 12V to stop motors skipping steps
 -
 (28-12-2022) Fine bed leveling
 -
 (28-12-2022) test PWM laser control
 -
 (21-12-2022) Collimate laser
 -
 (21-12-2022) Set up design plan for cooling system protection pcb
 -
 (21-12-2022) Wire up auxilary 12V supply to pump and fans
 -
 (18-12-2022) Added Project page for the cooling safety board LaserCutter: Laser Cooling Monitor
 -
 (17-12-2022) Mount additional 12V PSU for the cooling system and wire it up to share the main power connector
 -
 (14-12-2022) Fix Homing coordinates and general firmware config issues
 -
 (14-12-2022) Fix up stepper motor connection that occasionally doesn't work
 -
 (07-12-2022) Rough bed leveling
 -
 (07-12-2022) Fix Z-Bed clearances and fix it so it can move freely
 -
 (03-12-2022) Mount LCD housing
 -
 (01-12-2022) Design and print LCD housing
Status Log
11-01-2023 - PC setup and Camera tests
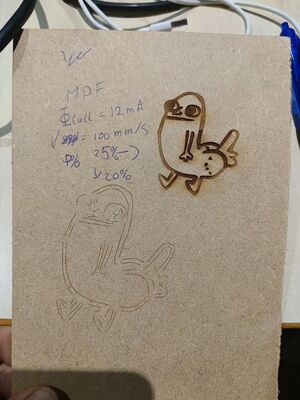
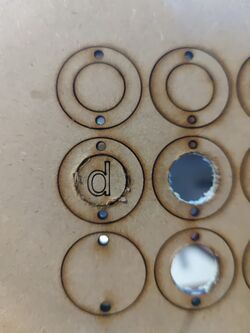
The laser control PC was set up with Ubuntu and Lightburn was set up to control the lasercutter. Endstops were added on both sides of the X-Axis. Since the MKS DLC32 does not accept separate endstops for the minimum and maximum of the axis, both were wired in series on the NC terminals. This will result in a trigger signal in the controller if either one of the two endstops is triggered. This seems to be working perfectly and will prevent the future air assist nozzle from being bumped off due to the frame edge. some additional testing was done to refine laser power settings.
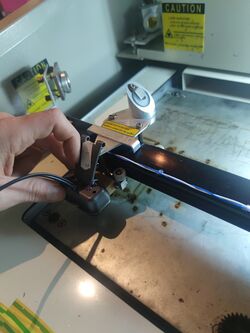
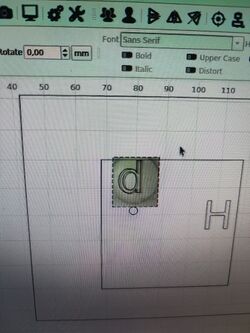
Lightburn has support for a head mounted camera to scan the working area and place designs on the right place. This will allow people to most effectively use the available materials with as little waste as possible. Also scanning the location of objects to be engraved is possible.
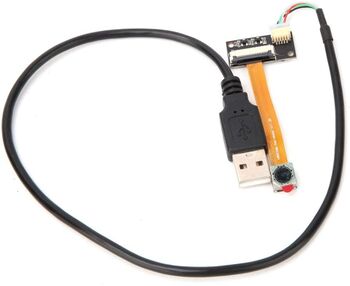
A new camera for this purpose was purchased, as the testing camera was way insufficient. the new camera is a 5MP OV5640 module with AutoFocus and usb 2.0. The resolution is 2592x1944 pixels. The result will be an approximate 0.03mm per pixel when mounted to the laser head. Tests will show if we can utilize the autofocus data to determine the bed height. If the autofocus data is not sufficient, a laser can be added in the view to triangulate the bed height.
This camera will arrive the jan 14th 2023 and will be installed as soon as possible. the usb cable will be replaced with a flat flex cable that rolls over the axis and the camera itself will be mounted as close to the laser as possible to minimize the loss in working area.
Latest Results / Photo gallery
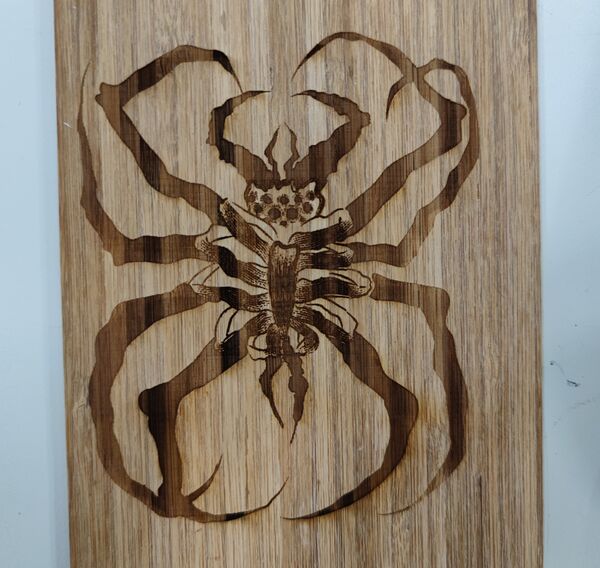
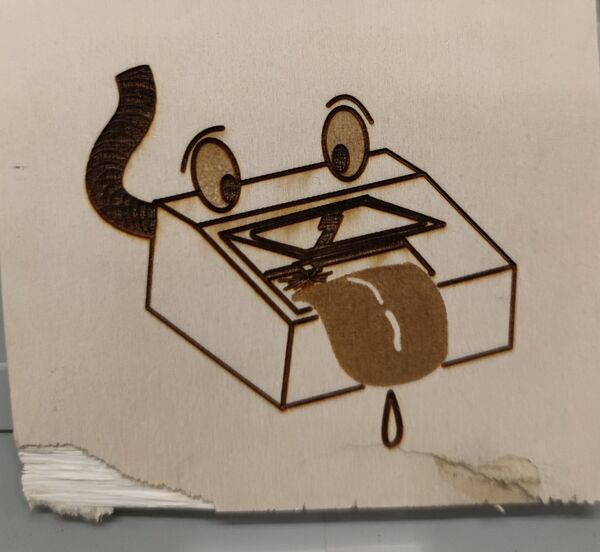
Latest rastering tests by PIx13 and Beatskip
