Difference between revisions of "WeatherDuino"
m (link to arduino tutorial) |
m (git link) |
||
| Line 6: | Line 6: | ||
|ProjectPurpose=Fun | |ProjectPurpose=Fun | ||
}} | }} | ||
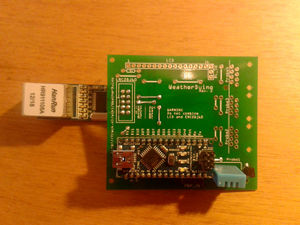
| − | We got a [http://frack.nl/wiki/WeatherDuino WeatherDuino] PCB via [[User:brainsmoke|brainsmoke]] via [http://frack.nl/ Frack] | + | We got a [http://frack.nl/wiki/WeatherDuino WeatherDuino] PCB via [[User:brainsmoke|brainsmoke]] via [http://frack.nl/ Frack]. [https://github.com/JanKlopper/WeatherDuino Git] |
It can measure temperature and humidity and you can make pretty graphs of the measurements. | It can measure temperature and humidity and you can make pretty graphs of the measurements. | ||
Revision as of 23:44, 25 February 2014
| Projects | |
|---|---|

| |
| Participants | Narya |
| Skills | Soldering, Coding |
| Status | Active |
| Niche | Electronics |
| Purpose | Fun |
We got a WeatherDuino PCB via brainsmoke via Frack. Git
It can measure temperature and humidity and you can make pretty graphs of the measurements.
Log
3-1-2014
- Soldered the components on it, now figuring out the code :)
- It measures.. and it broadcasts the measurements
- The python tool listens to the usb port (this was for the LCD display option I guess) and not to the broadcast address, so something needs to be written for this