Difference between revisions of "Embroidery machine"
(lemmings :)) |
m (change status "planning") |
||
| (5 intermediate revisions by the same user not shown) | |||
| Line 2: | Line 2: | ||
|picture=Lemming-blocker.jpg | |picture=Lemming-blocker.jpg | ||
|ProjectSkills=Electronics, Coding, | |ProjectSkills=Electronics, Coding, | ||
| − | |ProjectStatus= | + | |ProjectStatus=Planning |
|ProjectNiche=Electronics | |ProjectNiche=Electronics | ||
|ProjectPurpose=Use in other project | |ProjectPurpose=Use in other project | ||
| Line 43: | Line 43: | ||
=== XY frame === | === XY frame === | ||
| − | * Stuff for frame (ordered on 31 May 2014) | + | * Stuff for frame (ordered on 31 May 2014, at customs on 12 June, still at customs on 25 June...., in on 28 June) |
| − | ** | + | ** 2m [http://openbuildspartstore.com/v-slot-20-x-40mm/ V-slot rail] |
** 1.5m [http://openbuildspartstore.com/gt2-2mm-timing-belt/ Belt] | ** 1.5m [http://openbuildspartstore.com/gt2-2mm-timing-belt/ Belt] | ||
** 12 [http://openbuildspartstore.com/openbuilds-solid-v-wheel-kit/ Wheels] | ** 12 [http://openbuildspartstore.com/openbuilds-solid-v-wheel-kit/ Wheels] | ||
| Line 74: | Line 74: | ||
** Have put the [https://github.com/Protoneer/GRBL-Arduino-Library arduino GRBL library] on the Arduino | ** Have put the [https://github.com/Protoneer/GRBL-Arduino-Library arduino GRBL library] on the Arduino | ||
** Created a simple drawing in [http://www.inkscape.org/en/ Inkscape], converted the path to Gcode with this [http://wiki.linuxcnc.org/cgi-bin/wiki.pl?InkscapeHowto extension], and have sent the gcode to the arduino with the [https://github.com/winder/Universal-G-Code-Sender Universal Gcode Sender] | ** Created a simple drawing in [http://www.inkscape.org/en/ Inkscape], converted the path to Gcode with this [http://wiki.linuxcnc.org/cgi-bin/wiki.pl?InkscapeHowto extension], and have sent the gcode to the arduino with the [https://github.com/winder/Universal-G-Code-Sender Universal Gcode Sender] | ||
| − | [[File:20140613 003245.jpg|200px|thumb| | + | [[File:20140613 003245.jpg|200px|thumb|none|Uno to Nano]] |
* 13 June 2014: added connectors to both motors and ran a simple test | * 13 June 2014: added connectors to both motors and ran a simple test | ||
* 15 June 2014: embroidered a lemming by hand | * 15 June 2014: embroidered a lemming by hand | ||
| + | [[File:Lemming-blocker.jpg|200px|thumb|left|blocker]] | ||
Latest revision as of 22:06, 5 October 2015
| Projects | |
|---|---|

| |
| Participants | Narya |
| Skills | Electronics, Coding |
| Status | Planning |
| Niche | Electronics |
| Purpose | Use in other project |
Embroidery machines are pretty expensive. The software too. In this project I want to convert a normal sewing machine into a CNC embroidery machine. For this a XY table is needed to move the embroidery hoop under the needle. The sewing machine needs a small modification to control the speed and to monitor the needle position. I would like to start from SVG images, and convert this to GCODE to send patterns to the machine.
Contents
Links
Projects found on the interweb
- 2006, no documentation
- Lego
- Forum thread
- Makezine computerized sewing machine and here
- Openbuilds sausagePaws 2014 (will use this as basis)
Sewing machine embroidery by hand
Shops
Software
- GCode Inkscape extension
- G code reference
- GCode parser and CNC controller
- Open source embroidery software
CNC stuff
List of stuff
XY frame
- Stuff for frame (ordered on 31 May 2014, at customs on 12 June, still at customs on 25 June...., in on 28 June)
- 2m V-slot rail
- 1.5m Belt
- 12 Wheels
- 2 Pulleys
- 2 Motor mount plates
- Electronic parts (ordered on 31 May 2014, in on 11 June 2014)
- In house?
- M3/M5 Bolts and nuts
- Plate to mount everything on (DIY)
- Arduino UNO
Sewing machine controller
- http://www.instructables.com/id/Arduino-controlled-light-dimmer-The-circuit/
- something to measure the needle position
Two ways of sewing machine operation:
- continuous (quilting) This is probably the easiest way, because you only need to control the speed. Basically "on" with certain speed and "off"
- end-point punching (more like embroidery) Needs either accurate needle position info or a motor to make exactly one punch. In the second case this would be the Z axis.
Build log
- 11 June 2014: soldered pins on the Pololu drivers and soldered the CNC shield
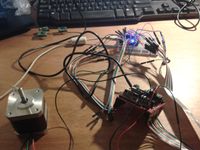
- 12 June 2014: connected the shield to an Arduino Nano (while waiting for an Uno). Connected a motor and tested the shield.
- Have put the arduino GRBL library on the Arduino
- Created a simple drawing in Inkscape, converted the path to Gcode with this extension, and have sent the gcode to the arduino with the Universal Gcode Sender
- 13 June 2014: added connectors to both motors and ran a simple test
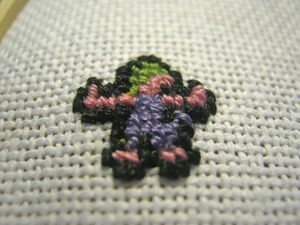
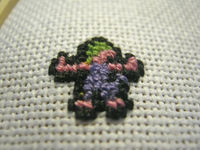
- 15 June 2014: embroidered a lemming by hand

