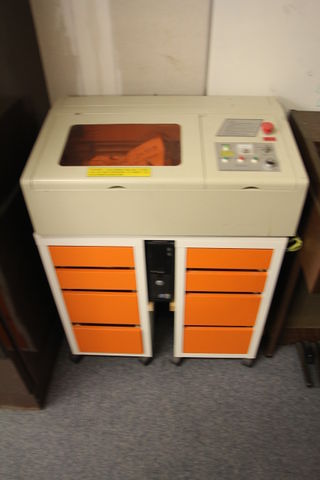
LaserCutter
| TechInc Inventory | |
|---|---|
| Description | It cuts with lasers |
| Make | Rabbit Laser |
| Model | HX-40A |
| Category | Mechanics |
| Operational Status | BROKEN |
| Super Users | Justa |
| Received at | |
| Acquisition Details | On permanent loan from Justa |
| Owner | User:Justa |
NOTE: THIS IS THE "WHITE" LASERCUTTER. THE ONE THAT HAS BEEN IN PRODUCTION HAS BEEN THE "RED" LASERCUTTER
That one belongs to 'sawugo' and is documented here: https://wiki.techinc.nl/LAOSLaserCutter
Change History
- full rewrite of info on 2021-12-23
Short introduction
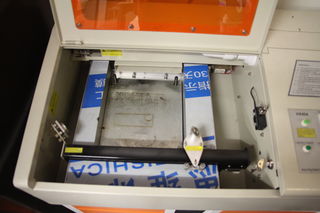
The lasercutter is a HX40A engraver/cutter, fitted with a 40Watt laser-tube, a small XY-table and originally comes with a controller-board for which only WinXP software exists that requires a PC with special USB-dongles for the license required by the software. The controller-board has all markings sanded off of all the chips and it is connected to the PC with the paralel-port like it is still 1989..
That'd not be so bad, if the software even did a good job of controlling the laser; which it doesnt. It is a nightmare.
The intention for the machine is to convert it to something modern. This work is in progress and is documented here.
Modifications
- Replace driver-board with [Makerbase MKS-DLC32 board] ESP32 based driver-board
-
 Get optical end-stops to work.
 -
 Get LCD-module mounted on front-panel (requires bezel and/or longer cables)
 -
 Test PWM-driving of laser-PSU via optocoupled 2-wire interface (see wiring-details)
-
- Set up self-contained water-cooling arrangement using PC-cooling radiators.
-
 Find suitable water-basin
 -
 Purchase submersible pump and wire it so it is on when machine is turned on.
 -
 Consider design for flow/temp-alarm circuit (that would trigger shut-off)
-
- Re-work the laser-delivery head into one with Air-assist.
-
 Purchase air-assist laser-delivery head as a replacement OR modify current head
 -
 Purchase and mount air-pump; create wiring for it . Consider 'turn on' when starting to cut, not 'always'
 -
 Consider chain-link cable-guide for air-delivery tube
-
- Align gantry after last modifications
-
 Gantry has been removed and might need another removal
 -
 Align using the 'ABC' method, using painter-tape, or consider a 'reverse' method with laser pointing from 'head' back to tube
-
- Look at Z-bed mechanics
-
 Look at bed mechanics and fix the problematic clearings
 -
 Current bed is hard to adjust and is manual. Purchasing an extra stepper , some guide-pullies and a longer belt would allow for auto-adjust via software.
-
- Consider FluidNC firmware instead of current firmware
- This is very likely to work without problems; requires careful flashing.
- Might need patches to support LCD , if possible at all
- Consider Web interface running on a Pi to simplify usage
Status Log
Here is a short list of the tasks that have to be performed and which have been done already:
-
 (28-12-2022) Fine bed leveling
 -
 (28-12-2022) test PWM laser control
 -
 (21-12-2022) Collimate laser
 -
 (21-12-2022) Set up design plan for cooling system protection pcb
 -
 (21-12-2022) Wire up auxilary 12V supply to pump and fans
 -
 (17-12-2022) Mount additional 12V PSU for the cooling system and wire it up to share the main power connector
 -
 (14-12-2022) Fix Homing coordinates and general firmware config issues
 -
 (14-12-2022) Fix up stepper motor connection that occasionally doesn't work
 -
 (07-12-2022) Rough bed leveling
 -
 (07-12-2022) Fix Z-Bed clearances and fix it so it can move freely
 -
 (03-12-2022) Mount LCD housing
 -
 (01-12-2022) Design and print LCD housing

