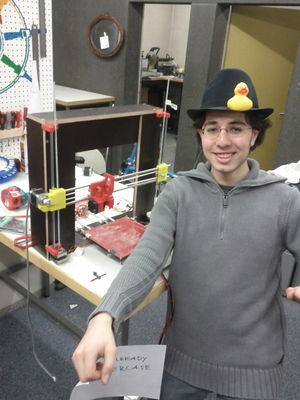
Prusai3
| TechInc Inventory | |
|---|---|

| |
| Description | 3d Printer |
| Make | RepRap |
| Model | i3 |
| Manufacturer Link | http://reprap.org/wiki/Prusa i3 |
| Category | Other |
| Operational Status | BROKEN |
| Super Users | User:amx109, User:Nathan7 |
| Received at | |
| Acquisition Details | We Built It |
| Owner | TechInc |
Our 3d printer based on the Prusa i3 design.
We call it 'Brenno the Printer'
Current Status
Lightweight stepper/extruder is working and so the machine is functional.
However it cannot yet be used for prints large/lengthy prints. The glass plate is warped, resulting in bad prints and the stepper on the extruder gets very hot.
Known Issues
- Z axis slips
- Glass bed is not flat
- the frame needs re-building because of the mounting holes not being aligned correctly
3D Printing Process
The process is this
- create STL file
- slice STL file, export to gcode
- print gcode
STL file
Many popular CAD/3D programs can output STL. here's some we use
- Blender
- OpenSCAD
And you can get ready made 3D objects from
Slicing the STL
We use the slicer software called Slic3r - it will generate the actual printer commands (G-code).
Sometimes slic3r complains (even if blender finds no problems with the model). To fix it use the following magic webservice (this is an interface to butt.netfabb.com ) :
curl --data-binary @orig.stl stlfix.jit.su -o fixed.stl
The gcode produced by our slic3r configuration will automatically 'home' the printer before it prints, and once its finished printing it will move the nozzle to X0, turn the hotend temperature down to 160 and turn off the motors.
Printing the STL
We use Pronterface to print.
- Load the program
- Hit 'connect' to connect to the printer
- Load the gcode file
- hit print and it should do its work. it can take upto 5mins before the printer actually starts printing.
Maintaining the printer during printing
- Make sure the hotend nozzle is free from plastic before it starts printing. Grab a pair of tweezers and pull any pieces of PLA/ABS away from the nozzle
- if the printer becomes unrepsonsive the following usually fixes it
- turn off the printer
- unplug the USB cable to the printer
- if the printer breaks or isnt printing correctly notify the maintainers. do not try to fix it. this is not because you dont have the ability to, but because the maintainers have a 'history of care' and want to identify recurring issues and hopefully fix them.
Specifications
- Maximum print sizes: (x,y,z) - 170mm, 170mm, "a lot"
- note the printed object will suffer from "warping" much before those limits are reached.
- Minimal print resolution: (x, y z) - ?, ?, 0.2mm
- Extruder nozzle size: 0.35mm
- It can print overhangs of less than 45degrees without scaffolding.
Printing supplies
- 3mm PLA (hard and britle, doesn't warp much, biodigradable)
- 3mm ABS (soft and tough - LEGO like plastic, warps much more the PLA)
Settings
Settings for the printer depend on the kind of filament.
PLA
- Bed temperature: 60
- Extruder temperature: 185
Pink PLA
For the pink PLA we print at 190 (195 for first layers). Bed at 65
ABS
- Bed temperature: 110 (but it seems the bed doesn't seem to reach that at the moment)
- Extrude temperature: 215