Difference between revisions of "FLSUN V400"
| Line 41: | Line 41: | ||
Open Orca. | Open Orca. | ||
| − | + | * Accept the certificate store location warning. | |
| − | + | * Select your region. | |
| − | + | * Search for "v400" and select the FLSun V400 | |
| − | + | * Select all the filaments | |
| − | + | * Don't install Bambu. | |
| − | Click "File" > "Import" > "Import configs..." and load this file: | + | Click "File" > "Import" > "Import configs..." and load this file: |
[link-to-file Download config-file] | [link-to-file Download config-file] | ||
Now click new project. | Now click new project. | ||
| − | + | * For printer select "FLSun V400 0.4 nozzle - Grey says use this" | |
| − | + | * For filament select the eSUN PLA-st | |
| + | |||
| + | ==== Magic number ==== | ||
| + | |||
| + | There is a magic number in the config. This is already included in the documentation file, but it is good to mention it here too. | ||
| + | |||
| + | The Z-offset (found in the printer settings, enable advanced settings, under tab Basic information) is: | ||
| + | 0.17 mm. | ||
| + | |||
| + | This is a offset to make the printer work well, ie: not grind into the print plate. Setting this is easier than leveling the machine. | ||
| + | |||
| + | This number may change occasionally (based on temperature or other variables) there is no clear channel to update this information at the moment. | ||
| + | |||
==== Some optional settings for good printing ==== | ==== Some optional settings for good printing ==== | ||
| Line 77: | Line 89: | ||
Next to the printer drop-down menu, click the WiFi icon. Then set: | Next to the printer drop-down menu, click the WiFi icon. Then set: | ||
| − | For hostname set: http://v400.prin.ti/ | + | For hostname set: http://v400.prin.ti/ |
Click test. | Click test. | ||
Revision as of 21:53, 13 August 2024
| TechInc Inventory | |
|---|---|
| |
| Description | 3D printer |
| Make | FLSUN |
| Model | V400 |
| Manufacturer Link | https://flsun3d.com/pages/v400 |
| Category | Electronics |
| Operational Status | Working |
| Super Users | Grey |
| Received at | 2024/06/01 |
| Acquisition Details | I have pre-donated my v400 to the space.
This machine is not yet the spaces property, but is fulfilling a need for a working printer. I am waiting on a replacement, bigger personal printer to arrive for my own use in my own home, at which point I would be donating the v400 anyway as it will become surplus to requirements, instead of selling it on, because I feel the space would benefit from access to it more than selling it to someone. When the time comes, this machine will be freely given to the space at no cost. I want to run some educational training on how to tend to the machine before handing it over completely. In the mean time, the space can borrow it. When my new FLSUN S1 printer turns up, I will hand over ownership, hopefully to a maintainer team that I intend to foster. I also intend to remove the tablet that controls it and replace it with a managed print controller running on a space ewaste computer. |
| Owner | User:Grey |
FLSUN V400 Printer
Contents
Using the printer:
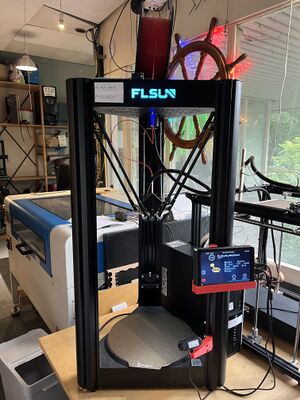
The v400 is a delta printer, its kinda fun to use. Its pretty hardy and fairly durable compared to an average 3d printer, and also fairly fast. Baring this in mind, if we stick to a known recipe of plastic and printer settings, it should Just Work:tm: most of the time.
It likes to run ESUN brand PLA+ (PLA-ST which is PLA with added herbs and spices that make it stronger) which is often < €15/kg. I've had great success with ESUN PLA+ and never had a clog with it.
Orca
Orca is nicer than Cura, so this one is recommended.
Install Orca
Download the latest version of Orca for your OS.
Configure
Open Orca.
- Accept the certificate store location warning.
- Select your region.
- Search for "v400" and select the FLSun V400
- Select all the filaments
- Don't install Bambu.
Click "File" > "Import" > "Import configs..." and load this file: [link-to-file Download config-file]
Now click new project.
- For printer select "FLSun V400 0.4 nozzle - Grey says use this"
- For filament select the eSUN PLA-st
Magic number
There is a magic number in the config. This is already included in the documentation file, but it is good to mention it here too.
The Z-offset (found in the printer settings, enable advanced settings, under tab Basic information) is: 0.17 mm.
This is a offset to make the printer work well, ie: not grind into the print plate. Setting this is easier than leveling the machine.
This number may change occasionally (based on temperature or other variables) there is no clear channel to update this information at the moment.
Some optional settings for good printing
Quality
Seem position: Random
Strength
Wall loops: 2 Top surface pattern: Concentric Bottom surface pattern: Concentric Sparse infill pattern: Adaptive cubic
Support
Enable support: yes Type: tree
Add the network printer
Next to the printer drop-down menu, click the WiFi icon. Then set:
For hostname set: http://v400.prin.ti/ Click test.
You should be able to print now!
Cura
To use it with Cura, you must do the following:
Install Cura
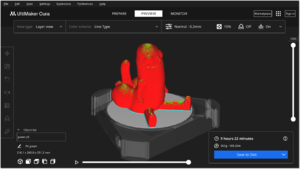
Download the latest version of Ultimaker Cura
Install Plugins
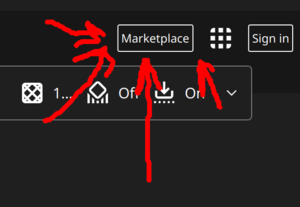
Open the Marketplace
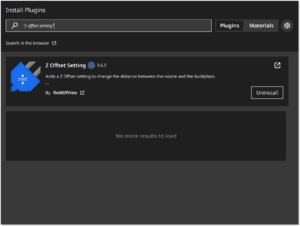
Install the z offset plugin
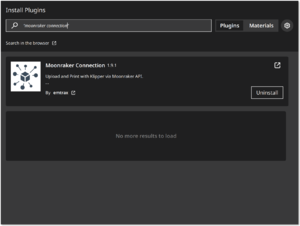
Install the moonraker plugin
Restart Cura
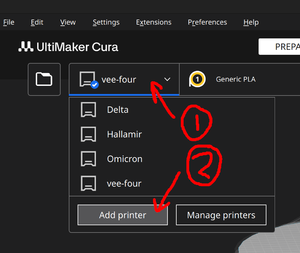
Add & Configure a new Printer
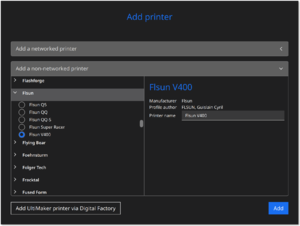
Then select "Non UltiMaker Printer". Expand the section labeled "Add a non-networked printer" even though this very much is a networked printer. Then scroll until you find Flsun, and select Flsun v400.
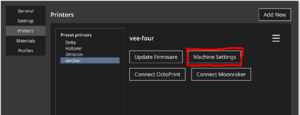
Configure the printer. Open Machine Settings
And then set the START GCODE and END GCODE as below:
Start G-code:
led_on
logo_on
G21
G90
M82
M107 T0
M140 S{material_bed_temperature}
M104 S{material_print_temperature} T0
M190 S{material_bed_temperature}
M109 S{material_print_temperature} T0
G28
G1 F3000 Z1
G1 X-150 Y0 Z0.4
G92 E0
G3 X0 Y-130 I150 Z0.3 E30 F2000
G92 E0
End G-code:
M107 T0
M104 S0
M104 S0 T1
M140 S0
G92 E0
G91
G1 E-1 F300
G1 Z+0.5  F6000
G28
G90 ;absolute positioning
logo_off
led_off
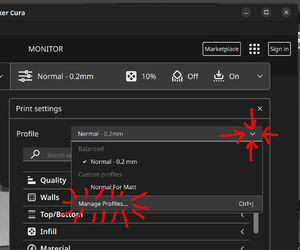
Import v400 print settings:
Then click Import and import the v400 profile: https://wiki.techinc.nl/images/8/8d/V400.curaprofile.gz (you will need to un-gzip it, mediawiki wont let me upload the .curaprofile file alone even though its technically already a zip)
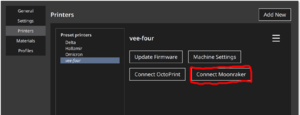
Finally, connect to the printer:
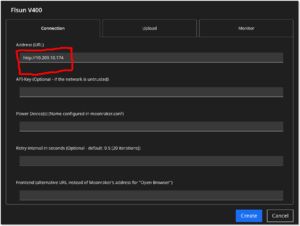
On the "Connection" tab, set the connection address: (at http://10.209.10.174 at time of writing)
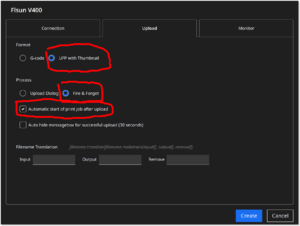
And on the "Upload" tab, set the Following settings:
- UFP with Thumbnail enables the printer to show a thumbnail of the print its going to run
- Fire & Forget means you wont be sat there wondering why your print isn't running after pressing upload
- Automatic job start for the above reason too.
Optional: Configure Timelapse
You need to inject some gcode to your process in between each layer:
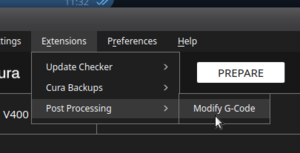
Find the Modify G-code button under Extensions => Post Processing => Modify G-code:
Then insert a new Post Processing Script as "Insert at layer change" set to Before / TIMELAPSE_TAKE_FRAME:
All done!
Happy printing!
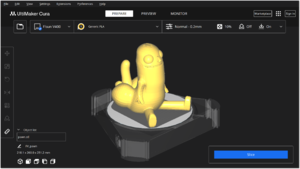
Place your part:
Slice the part:
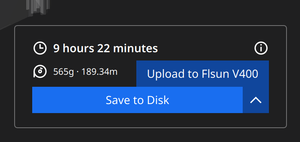
Send it:
