Difference between revisions of "RainwaterToilet"
m |
|||
| Line 1: | Line 1: | ||
{{Project | {{Project | ||
|ProjectSkills=Plumbing, Building | |ProjectSkills=Plumbing, Building | ||
| − | |ProjectStatus= | + | |ProjectStatus=Finished |
|ProjectNiche=Mechanics | |ProjectNiche=Mechanics | ||
|ProjectPurpose=World domination | |ProjectPurpose=World domination | ||
Latest revision as of 22:29, 19 December 2019
| Projects | |
|---|---|
| Participants | |
| Skills | Plumbing, Building |
| Status | Finished |
| Niche | Mechanics |
| Purpose | World domination |
To try make my new house a bit more environmentally-innocuous I decided to make a system that collects rainwater and uses it for flushing toilet(s), in addition to irrigate the garden.
First I had to make a design.
Several systems are possible, but for simplicity I opted for a pressurized water pump (hydrofoor) that simply automatically keeps its outlet pressurized. Then you can make the rest of the system like any other standard plumbing, since the municipal water supply has similar properties. A lot less error-prone than remote water-level sensors that need to signal a pump to shut off...
So the requirements were:
- a large buffer (rain barrel) plus automatic fill system
- pressurized water pump + water filter
- a separate extra conduit from pump to toilet(s)
- re-routing some of the roof drainpipe to collect as much water as possible
- a system that allows switching back to tap water in times of drought
I also needed to determine a suitable spot. Putting it outside means you have to shut it down and drain it in times of frost. Putting components inside can cause noise problems, and takes up a hell of a lot of space.
I decided that outside the house was the best choice.
I purchased the cheapest pump I could find, some tubing and fittings, two water filters, a check valve, a dry-run protection sensor and built a proof of concept. All told between €250 and €300 I think, excluding the rain barrel and excluding the plumbing.
Then I put the assembly in my work shed and also purchased a beautiful 400 liter very inconspicuous rain barrel. Digging a large hole in the garden to put in a 1000l underground tank was way too much effort, even if that would have meant it could be made more or less frost proof.
The last requirement was trivial to meet: just two faucets, one for fresh water and one for rain water, and a check valve in the fresh water line to prevent backflow. This is the only part of the project that isn't finished yet (because it has a dependency on the new bathroom getting finished)
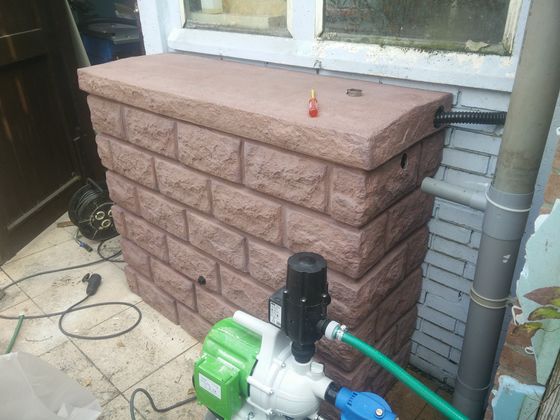
The pump in an early test setup. the red stone thing in the background is the actual rain barrel.
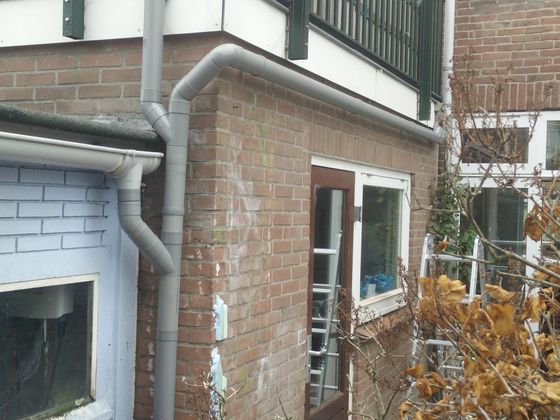
To get as much rainwater as possible I rerouted a drainpipe (the long horizontal stretch)
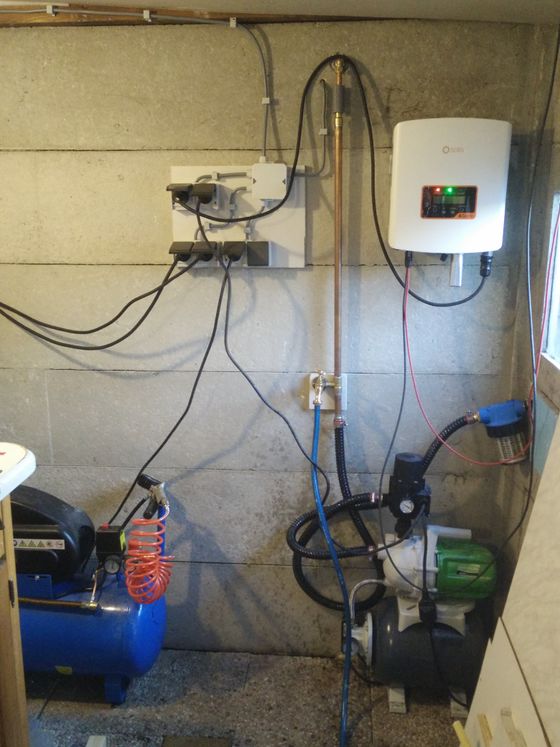
Pump assembly inside shed. I added insulation later and changed the tubing to a better variety.
At the right is the water filter. On top of the pump the (black) dry-run sensor / protection switch.
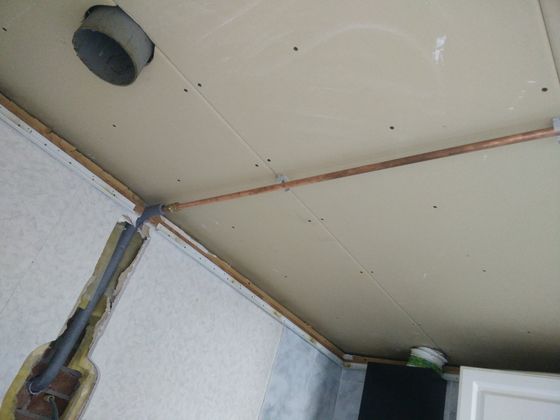
Conduit entering the house at the left, and then moving up to the ceiling. To prevent frost etcetera
it is embedded in a 40mm PVC pipe, with the foam insulation as depicted around the water pipe.
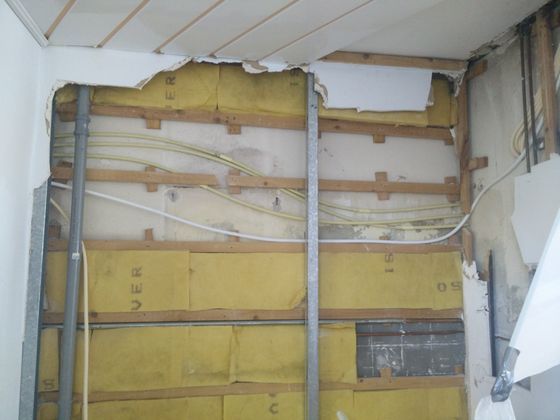
This plasterboard wall had to be completely demolished to get the rainwater tube behind it (the white tube).
Removing only a horizontal section of plasterboard would not have worked, because I had to remove the entire
metal stud in the right corner to get the tube through there. This is two-layer (plastic+aluminum) tube,
which bends but it's not quite flexible enough to be able to just string it through a couple impossible curves...
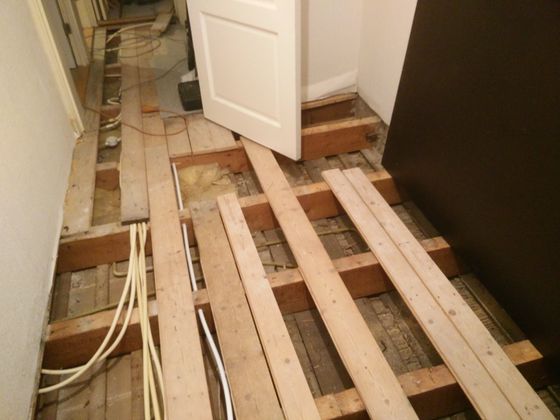
and here it travels through the upstairs wooden floor beams in my (future) new bathroom...
Stuff I learned along the way... :\
- Don't save on tubing and fittings. Instead of getting the good 1" tubing (reinforced, otherwise it 'collapses' when the pump starts sucking water!) I went with a cheaper variety. The trouble with that is that the clamps I used cannot "grip" the tubing tight enough, so you never get a 100% airtight fit. That resulted not just in tiny leaks, but worse it lead to the pump losing pressure overnight so it had to be reset every morning. It was pretty hard to pinpoint that cause. I almost returned the dry-run sensor as defective. There was a mismatch between the clamps I used and the tubing, or it was the wrong tubing.
- Getting a conduit all the way through the outer wall, past the kitchen, all the way to the front of the house is a gargantuan task, depending on how your house is laid out, your willingness or ability to demolish stuff, and other factors. Had the bathroom been at the other side of the house it would have been so much easier... Also, a 40mm hole 450mm deep is hard to do. But Oh well, gotta do what's gotta be done... in the end, the result is all that matters.
- You always, always need a bigger reservoir than you thought you did... and indeed, after some brainstorming, I ended up adding a second rain water barrel. That deploys an ugly hack; I put a faucet into each tank's frost drain outlet all the way at the bottom. There's a garden hose connecting the two, the hose can be temporarily removed when necessary. The hose ensures both barrels always have corresponding water level. The second barrel needed a tiny hole drilled at the top to let air escape since otherwise it was completely airtight.
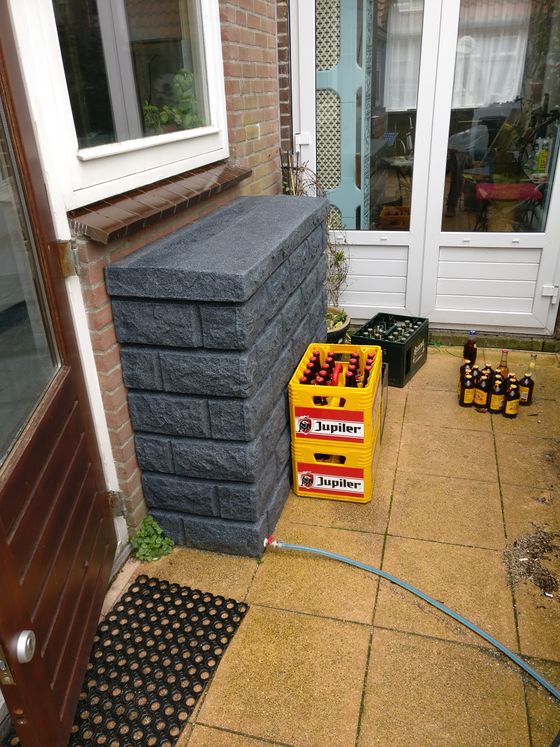
This is the second rain barrel, with the garden hose 'hack' that keeps the water levels balanced.
So, a lot of work... resulting in an 800 liter rainwater tank system. Why? Because we can! ;)