Difference between revisions of "Stapled felt cover for E-Book reader"
| (2 intermediate revisions by the same user not shown) | |||
| Line 8: | Line 8: | ||
Quick hack: I made a cover for E-book reader using stapler :) | Quick hack: I made a cover for E-book reader using stapler :) | ||
| − | Step by step instructions | + | It took me an hour, and I had all the materials at home, but they are really easy to find (...mostly Hema). |
| + | |||
| + | =Step by step instructions= | ||
What you need is: felt, velcro, stapler, scissors. | What you need is: felt, velcro, stapler, scissors. | ||
| Line 66: | Line 68: | ||
Image:cover for ebook reader - 13.jpg | Image:cover for ebook reader - 13.jpg | ||
| + | Next projects: make the cover using sewing machine & felt; another one from leather; and laptop cover made of lanyards :) | ||
</gallery> | </gallery> | ||
| + | |||
| + | =Related projects= | ||
| + | |||
| + | * [[Fifty_Shirts_of_Gray]] | ||
| + | * [[T-shirts_Hacking]] | ||
Latest revision as of 23:31, 20 December 2013
| Projects | |
|---|---|

| |
| Participants | Becha |
| Skills | stapling |
| Status | Finished |
| Niche | Sewing |
| Purpose | Fun |
Quick hack: I made a cover for E-book reader using stapler :)
It took me an hour, and I had all the materials at home, but they are really easy to find (...mostly Hema).
Step by step instructions
What you need is: felt, velcro, stapler, scissors.
- Cut felt to measure: size of E-Book reader + 1cm extra on every side.
- Staple the outer corners first, planning to have them as "triangles". I started with 2 staples on each side...
- ... but that was too little so I added 3rd staple. // Cut the "triangles" off.
- Now, add one of the inner corners. Staple on the narrow side of "reader".
- Then fold the cover, and staple from the OUTSIDE of the wide side of the "reader".
- Try if the reader fits in, and adjust by stapling extra here-and-there.
- For the "closing" mechanism: cut the ribbons, and staple them to the end of "flap".
- Cut velcro in pieces that fit the width of ribbons.
- Staple velcro to the "bottom" of the cover.
- Next, staple velcro to the ribbon. Cut the excess of ribbon.
- Add some extra staples, to make velcro more attached to the ribbon.
- This is how it looks finished, from the outside!
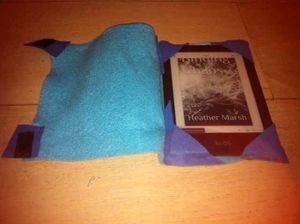
- This is the final look, when open.
- Next projects: make the cover using sewing machine & felt; another one from leather; and laptop cover made of lanyards :)


